- Explanation of Types of Accounts
- Institutional Accounts
- Logging in Using an Institutional Account
- Creating a Standard Account
- Logging in Using a Standard Account
- Switching from a Standard to an Institutional Account
- Switching from an Institutional to a Standard Account
- Merging Accounts
- Managing Your Account
- My Data
- Notifications
- Muting Notifications
- Account Information
- New Standard Account Password
- API Token
Anyone can search, view, and download unrestricted data without a user account. However, anyone who wishes to request access to a restricted dataset must have a user account. Only members of participating institutions and their collaborators can deposit data into the repository.
Explanation of Types of Accounts
There are two types of accounts: an Institutional Account and a Standard Account
An Institutional Account allows you to login using the same username and password you use to access your institution’s online services (e.g., single sign-on), like your institutional email. Note that not all participating institutions in the Borealis service are currently set up to use Institutional Accounts. See details below about Institutional Accounts.
A Standard Account allows you to create an account using an email or username and password. If you are affiliated with a participating institution, make sure to use your institutional email address to create your account because your affiliation is based on your email domain. Users who are not members of a participating institution can create a standard user account using any email address. See details below about Standard Accounts.
Institutional Accounts
If your institution has enabled an institutional account, the name of your institution will be included in the drop-down menu on the Log In page.
- Click the Log In link in the upper right menu to go to the Log In page.

- Open the Your Institution drop-down list and look for your institution’s name.
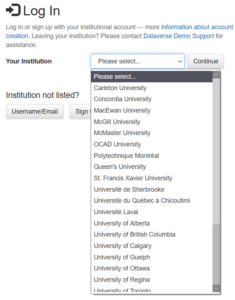
- If your institution is listed, you’ll be able to log in using your institutional account.
- If your institution is not listed, you’ll need to create a standard account in order to log in.
Logging in Using an Institutional Account
- Select your institution from the drop-down menu and click Continue.
- You will be redirected to your institution’s authentication page. You will need to enter your institutional username and password on this page and click the appropriate button (e.g., Log In, Login, Sign On, Continue, etc.).
- This is normally the same username and password you use to access your institution’s online services, such as email or the library.
If this is your first time logging in using an institutional account, you may be asked to agree to release information to the repository service. Follow the instructions to accept the release and create your account. Once your account is created, you will be redirected to your institutional collection.
Creating a Standard Account
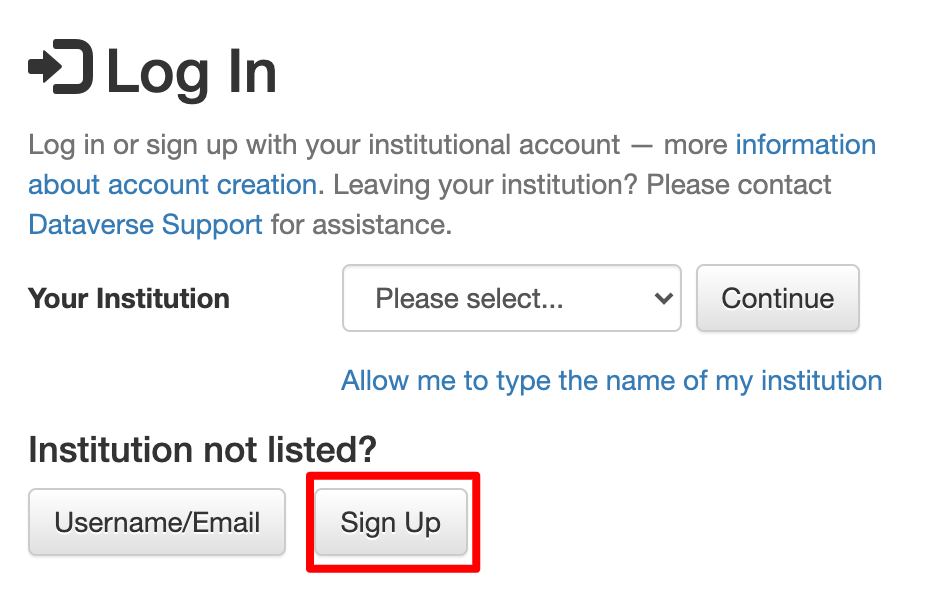
- Click the Log In link in the upper right menu bar to go to the Log In page.

- Click on the Sign Up button under the section titled “Institution not listed?”.
- On the Account Information page, enter your email address in the Email field.
- If you are affiliated with a participating institution, make sure to use your institutional email address to create your account because your affiliation is based on your email domain. When affiliated, users are brought to their institutional collection upon login and automatic permissions settings may be assigned.
- If you do not have an institutional email or your institution is not a member, enter any valid email address.
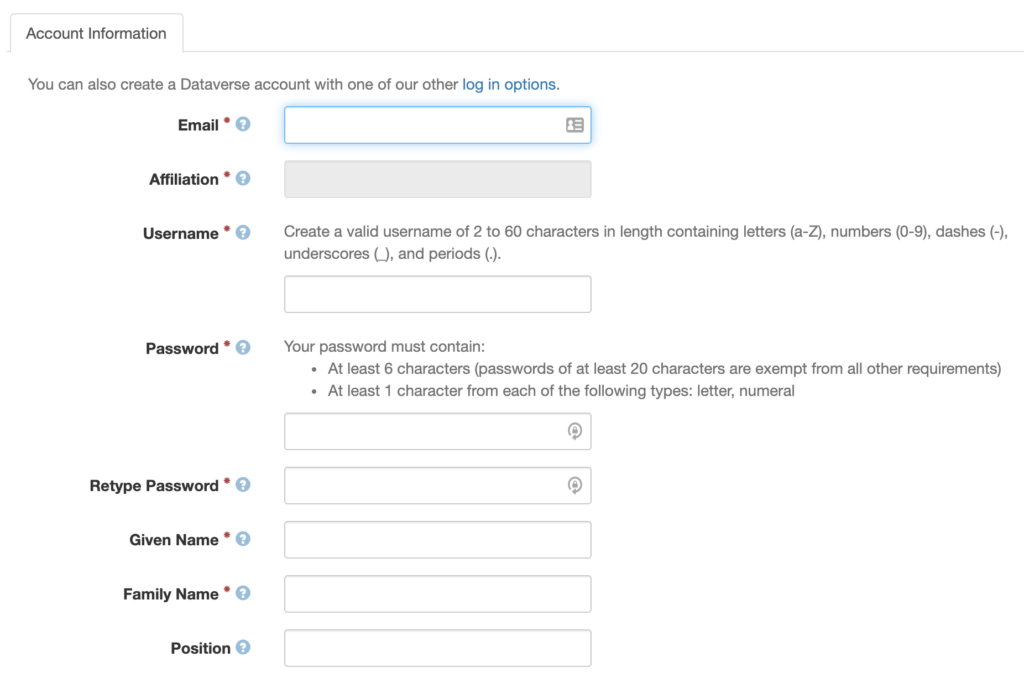
- The Affiliation field will be populated with the name of your institution, based on the email address you entered.
- If your institution is not a member, or you entered a non-institutional email address, the Affiliation textbox will populate with “OTHER.”
- Enter the appropriate information in the rest of the required fields, marked with a red asterisk (*), including the username and password of your choice, and your first and last names.
- Scroll to the bottom of the Account Information page to read the Borealis Terms of Use.
- If you are satisfied with the terms of use, check the box to accept the terms and click the Create Account button.
- You will receive an email to verify your new standard account. Click on the link provided in the email to confirm and finalize your account setup. You will need to verify your email before you can add collections or datasets and upload files.
Logging in Using a Standard Account
- Click the Log In link in the upper right menu bar to go to the Log In page.
- Click on the Username/Email button under “Institution not listed?”.

- Enter your username or email address in the Username/Email field.
- Enter your password in the Password field and click the Log In button.
Switching from a Standard to an Institutional Account
A participating institution may enable institutional accounts (i.e., single sign-on) after you’ve already created a standard account. You will not be notified by Borealis when this happens, but you may receive a notification from your institution. You can continue to use your standard account if this happens, or you can switch to an institutional account to benefit from using your institutional credentials.
- Check the Your Institution drop-down list to determine if your institution has set up institutional accounts. If you see your institution listed, select your institution and click Continue.

- Follow the instructions to log into your institution via their authentication page (i.e., single sign-on).
- This is normally the same username and password you use to access your institution’s online services, such as email or the library.
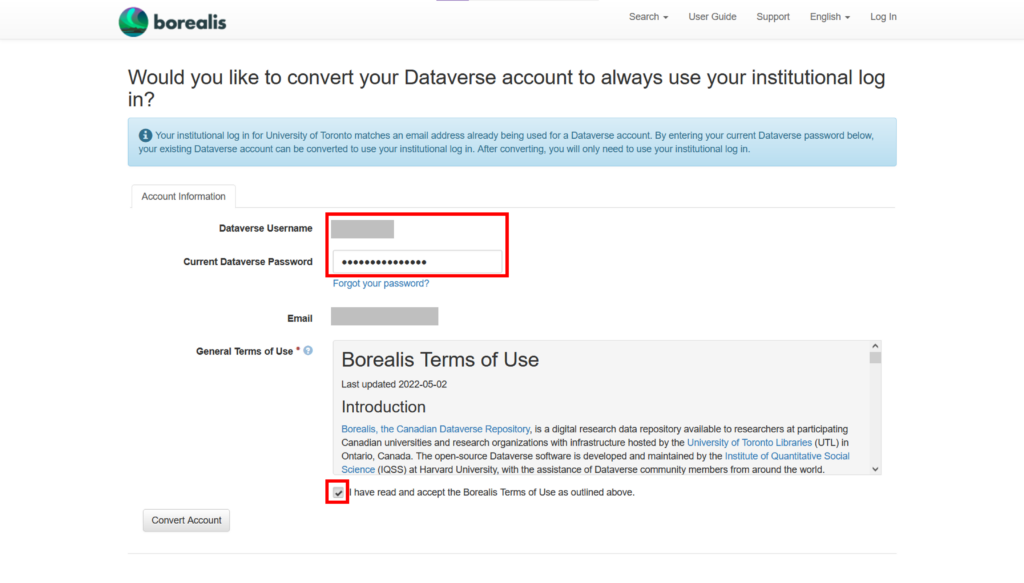
- Enter your standard account username and password on the page asking: Would you like to convert your Dataverse account to always use your institutional log in?
-
- Your email address will populate based on the username and password you provide.
-
- Review the Borealis Terms of Use. If you’re comfortable with the terms of use, click the checkbox to accept those terms.
- Click the Convert Account button.
- Once the page reloads, look for the green Success! bar at the top of the screen to confirm your account was converted.
Switching from an Institutional to a Standard Account
If you lose access to your institutional login, such as if you move to another institution or graduate, your account can be converted to a standard account so that you can continue to access your data. Changing from an institutional account to a standard account requires you to change the email address associated with your account.
If you already have more than one account, your accounts can be merged, so your new account has access to the data you deposited under your previous account.
To request that your account be converted:
- Click the Support link at the top of the page, which will open a Contact Dataverse Support window.
- Enter “Change Account Type to Standard” in the Subject field.
- Enter the following information in the Message field:
- Your username and email address for your account.
- The new email address you would like to use for your account.
- Complete the skill-testing question.
- Click the Send Message button.
You will be contacted by a member of our team to verify your accounts.
Merging Accounts
If you end up with more than one account, they can be merged into one account.
- Make note of the login IDs and email addresses used for each of your accounts.
- Log into one of your accounts.
- Click the Support link at the top of the page, which will open a Contact Borealis Support window.
- Enter “Merge Accounts” in the Subject field.
- Enter the following information in the Message field:
- List each of your accounts, with the login ID and email used for each one.
- Specify which account you want to keep.
- Ask that all other accounts be merged into the account you want to keep.
- Complete the skill-testing question.
- Click the Send Message button.
You will be contacted to verify your accounts.
Managing Your Account
Once you are logged into Borealis, you will see your name in the top right corner. When you click on your name, a drop-down menu appears with five options: My Data, Notifications, Account Information, API Token, and Log Out.
When you click on one of the first four options, you’ll be taken to a new page with each of these options displayed in its own tab. You can move between sections by clicking on the tab name.

My Data
The My Data tab displays collections and datasets related to your account, including collections and datasets you’ve created, files you’ve uploaded, or any items you have the permission to edit.
On the left-side of the screen, you can use the Search my data… textbox to search for any key term within the items associated with your account. You can also click on the filters (in blue text) to display only the items that match your criteria. You can filter your data by item type, publication status, and roles.
Notifications
System notifications are generated for a number of actions, such as when you create a new account, collection, or dataset. They are also generated when a user requests access to a restricted dataset or file. Notifications appear in the account menu (i.e., “in-app notifications”) and are also sent to the email address of the user account.
To review notifications in the Account Menu, the Notification tab displays any notifications your account has received.
If you have unread notifications, that number will appear in a red box beside your name in the upper, right corner of the page, and beside Notifications in the drop-down menu when you click on your name.
You can delete a notification in the notification menu by clicking on the X on the right-side of the notification.

Muting Notifications
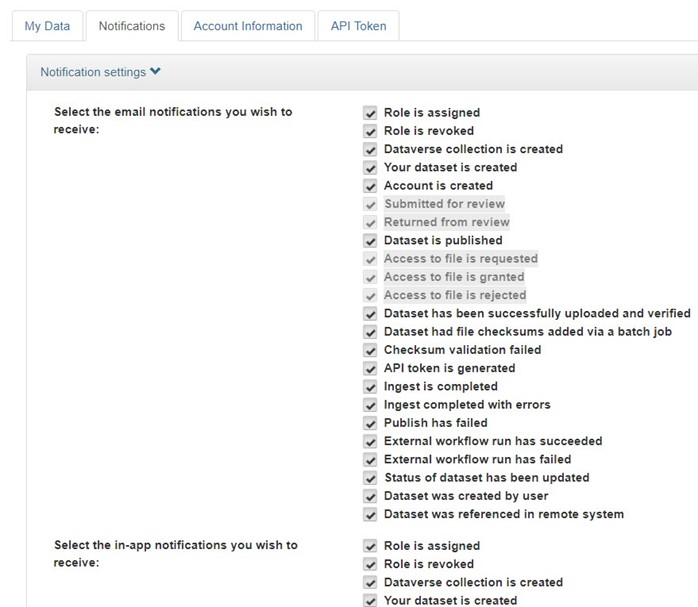
Some users may receive many notifications based on their activity (e.g., role assignment or dataset creation within a collection). You can manage which notifications you would like to receive and which ones you would like to mute. If you do not wish to receive notifications for all actions, you can choose which notifications to mute or keep active in the Notification settings tab for both email and in-app notifications.
- Under the Account menu, select the Notifications tab and expand the Notification settings window, which is divided into email notifications and in-app notifications.
- Deselect any email or in-app notifications you do not wish to receive.
- Some notifications cannot be muted, including dataset submitted for review, dataset returned from review, and file access notifications.
Account Information
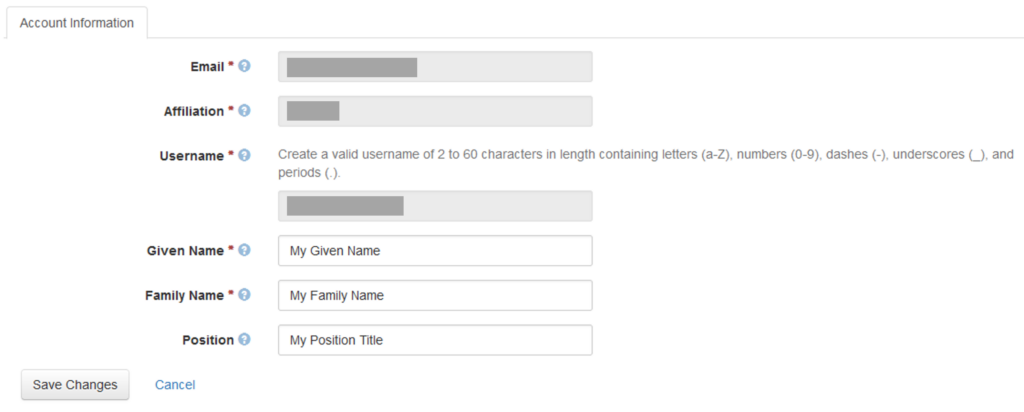
The Account Information tab lists your Username, Given Name, Family Name, Email, Affiliation, and (optionally) Position. If you have logged in using an institutional account, you will not be able to edit any account information on this page. If you logged in using a standard account, you can use this page to edit some account information.

- Click on the Edit Account button and select Account Information to edit your Given Name, Family Name, and/or Position.
- Update any of these three fields and then click Save Changes to save your new information.
Even with a standard account, you cannot edit your email address or affiliation. If you need to use a different email address, you will need to create a new account with that email address. Your affiliation is always linked to your email address. You can request that your accounts be merged, if needed.
New Standard Account Password
You can also use the Account Information page to create a new password for your standard account.

- Click on the Edit Account button and select Password to change your current password.
- Enter your current password in the Current Password textbox, then enter your new password in both the New Password and Retype Password textboxes.
- Click the Save Changes button to save your new password.
API Token
The API Token tab displays your account’s API token, which is a unique identifier and allows you to access your account (and associated collections, datasets, and files) using Dataverse API commands. API tokens are valid for one year, at which point a new token must be generated. For more information about using the API, review the API Guide.