- Administration in Horizon
- Creating a Project
- Creating a User
- Groups
- Creating a Group
- Adding Users to a Group
- Assigning a User or User Group to a Project
- Limiting Public Access by IP
- Administration in DuraCloud
- Users
- Managing Users
- Managing User Groups
- Spaces
- Creating Spaces
- Assigning Space Permissions
- Providing Public Access
- Reviewing Space History
This guide is intended to support OLRC administrators who manage users and user groups, the domain or projects in Horizon, spaces in DuraCloud, and general access controls.
Administration in Horizon
This section provides guidance on using admin privileges with either a Domain or a Project in Horizon.
The OLRC uses a role-based access control model using Keystone V3 to provide authorization to domains and projects.
There are four roles:
- domain admin: an administrator that has cross-domain access and can perform administrative operations such as creating projects and users. Inherits the project admin role
- project admin: an administrator that can manage settings and users for a specific project. Inherits the member role
- member: a user with read/write access to the containers within the project they are scoped to. Inherits the reader role
- reader: a user with read-only privileges for the containers within the project/s they have permissions to access
In more detail, a domain administrator has the permission to:
- Create other domain administrators
- Create projects, groups, and users
- Delete projects, groups, and users
- Assign or revoke a role for a user or group on any project
Users with domain administrator permissions can only be created using the command line.
A project administrator can:
- Assign or revoke roles for users on projects they administer
To access project administrator functions when using Horizon, you must be in a project for which you have the administrator role. Change your project using the drop-down in the top left.
Creating a Project
Projects can only be created by a domain administrator. Ensure you have logged in with the appropriate credentials.
- In the left sidebar, expand the “Identity” menu and select “Projects.”

- Click “Create Project” in the top-right of the Projects page.

- In the “Create Project” window, give your project a name. We recommend adding a description to indicate the purpose of the project, but this is optional.

- The project name and description can also be modified after the project is created by selecting “Edit Project” from the Actions drop-down menu to the right of the project name on the Projects page.
- You can also add users or groups to this project by selecting either the “Project Members” or “Project Groups” tabs respectively.
- Users and groups must be created before they can be assigned to projects in this window. Access to projects can also be provided and modified after the project is created.
- Once the form is complete, click the “Create Project” button to confirm your changes.
Creating a User
Users can only be created by a domain administrator. Ensure you have logged in with the appropriate credentials.
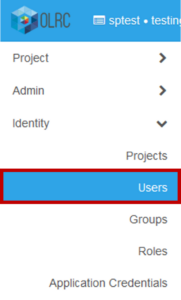
- In the left sidebar, expand the “Identity” menu and select “Users.”
- On the Users page, click “Create User” in the top right.

- Fill in the “Create User” form as appropriate.
- A username and temporary password are required.
- A description and email address can optionally be added.
- At this stage, you may select a Primary Project for this user. The Primary Project is simply the first project that a user is assigned to. A project must be selected before a user can successfully log into Horizon. If you intend to create the project, assign user permissions, or add the user to a group at a later stage, the user’s details can be edited at that time to set their Primary Project.
- When the Primary Project is set, select either the “reader,” “member,” or project “admin” role that you would like to assign to the user for that project.
- By default, a user account will be active once the form is completed and saved. If you would like the user to be disabled until a later time, deselect the checkbox next to “Enabled.”
- If you would like to prevent the user from changing their password using self-service APIs, check the “Lock password” box.
- Once the form is complete, click the “Create User” button.
- Send the new user their username and password, and ask them to change their password on first login.
Groups
Groups are collections of users that can be created to simplify user management. Once a group is created, individual users can be added to the group. This group can in turn be assigned to one or more projects. All users within the group will then have the same permissions for that project.
User groups can only be created and updated by users with domain administrator permissions.
Creating a Group
A group must be created before users can be added and group-based access to projects provided.
To create a group:
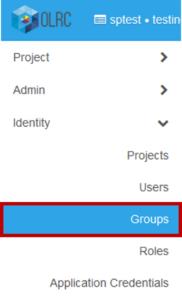
- In the left sidebar, expand the “Identity” menu and select “Groups.”
- On the Groups page, click “Create Group” in the top right.

- In the “Create Group” window, provide a name for the group. You may also add a description of the group.

- Once the form is complete, select “Create Group” to finish the process. The new group will appear in the listing on the Groups page.
Adding Users to a Group
Adding users to a group allows you to assign project permissions to the group as a whole instead of manually granting permissions to individual users.
To add users to a group:
- In the left sidebar, expand the “Identity” menu and select “Groups.”
- On the Groups page, locate the user group in the listing and select “Manage Members” in the Actions list to the right. This will bring you to the Group Management page.

- From here, click the “Add Users” button on the right.

- In the “Add Group Assignment” window that opens, check the box to the left of each user that you would like to add to the group.
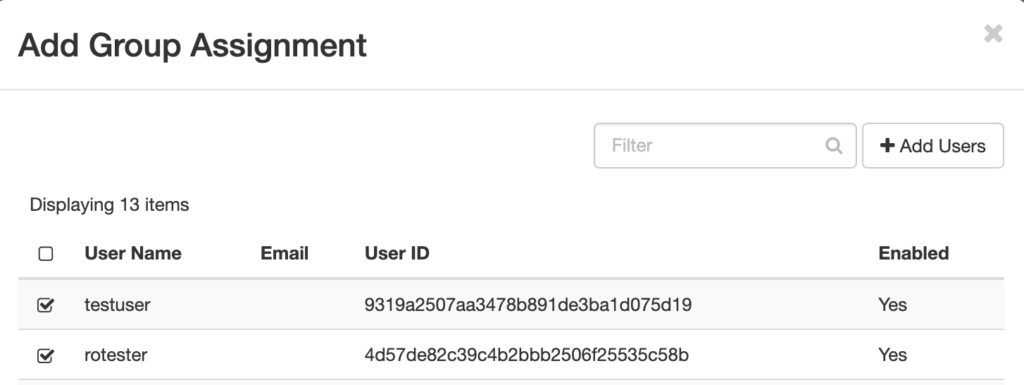
- Once you’ve made your selection, click the “Add Users” button at the top right of the window. The page will refresh and list the usernames of the accounts added to the group.
Assigning a User or User Group to a Project
Once your project/s are created, you may need to extend access to staff members at your institution. If more than one staff member requires access to a particular project, or the same staff members will be accessing multiple projects, you may consider creating a group first to more easily manage users and roles. You can also create individual users and add them directly to projects.
Groups and users can be assigned to a project by users with domain or project administrator permissions:
- In the left sidebar, expand the “Identity” menu and select “Projects.”
- On the Projects page, locate the project that you would like to add groups or users to in the project listing. Select the “Manage Members” button to the right.
- In the “Edit Project” window, select the “Project Members” tab to add an individual user or the “Project Groups” tab to add a user group.

- These tabs will display a list of all available users or user groups on the left and a list of users or user groups that have been assigned to the project on the right. From the list on the left, click the blue plus sign (+) next to each user or group that you want to add.
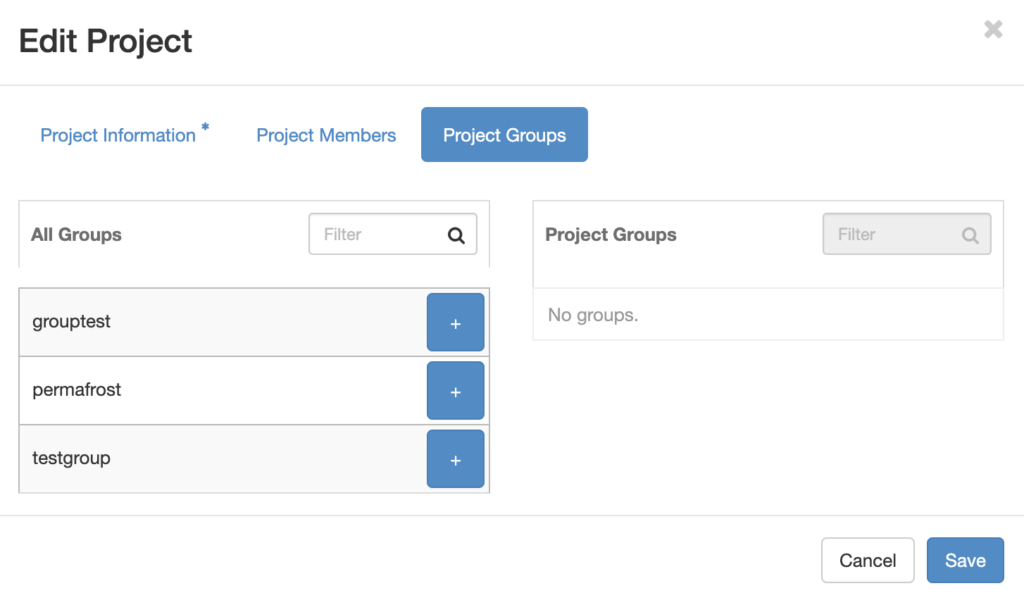
- The name of the user or group will appear in the right column. From here, select one of reader, member, or admin from the drop-down to assign the user a role for the project.

- Click “Save” to add the user or group to the project.
Limiting Public Access by IP
An experimental feature is available to limit public access to a container or project by IP range. This feature can be used with containers that have public access enabled, and does not impact access through the standard Swift or Horizon methods.
IP restrictions can only be set using the Swift CLI. If you have not done so already, you will need to set up your Swift CLI environment before using this command.
To set IP restrictions, use the following command, replacing the IP range/s and container name with your own. If you send the command without a container, the IP restriction will apply to all public containers in the project:
swift post --meta "ip-allowlist: 10.10.10.0/24,20.20.0.0/16" container-name
The following command will remove the IP restrictions:
swift post --meta "ip-allowlist:" container-name
It is possible to combine project-level and container-level restrictions for more complex access controls. For example:
swift post --meta "ip-allowlist: iprangeA,iprangeB,iprangeC"

swift post --meta "ip-allowlist: iprangeA" container1

swift post --meta "ip-allowlist: iprangeB,iprangeC" container2
With the above commands, we have limited access for container1 to only IP range A, container2 to IP ranges B and C, and provided access to all other public containers in the project to ranges A, B and C.
Administration in DuraCloud
Users assigned the Owner or Administrator role for their organization’s DuraCloud account may create and manage user accounts, user groups, and spaces.
For each DuraCloud account that a user is added to, the user can be given one of three roles in DuraCloud:
- owner: an owner can assign users the Owner role, restrict permissions, run services, and configure the DuraCloud interface. Inherits the administrator role
- administrator: an administrator can create users with the Administrator or User roles, manage user groups, and administer spaces and their access permissions. Inherits the user role
- user: a user can view, add, edit, and/or remove content, depending on their read/write permissions for a given space
Users
Users are created and managed through the Management Console. Once created, users can be granted access permissions for individual spaces in the web interface.
A user only requires one user account to access multiple DuraCloud accounts. If an individual has already created a DuraCloud user profile for Permafrost, the same user profile can be connected to the organization’s OLRC DuraCloud account. The same credentials can then be used to login.
Managing Users
To create a user:
- Log into the DuraCloud Management Console.
- Navigate to the relevant account and click “Manage users and roles” to the right of the relevant DuraCloud account. This will bring you to the Manage Account Users page.

- In the “Add Users” section, enter their email address under “Invite users” and click “Invite” to send an account invitation email to their address. Note that email invitations expire after two weeks.

- The user’s email address and the expiration date for the invitation will be listed in the “Pending Users” section at the bottom of the page. If an invitation was sent in error, select the “Delete” button next to the entry to invalidate links.

- The user’s email address and the expiration date for the invitation will be listed in the “Pending Users” section at the bottom of the page. If an invitation was sent in error, select the “Delete” button next to the entry to invalidate links.
- Once the user completes the steps outlined in the account invitation, their user will be successfully connected to the organization’s DuraCloud account and you will receive an email with “DuraCloud Account Management: Invitation Redeemed” in the subject and their username in the body.
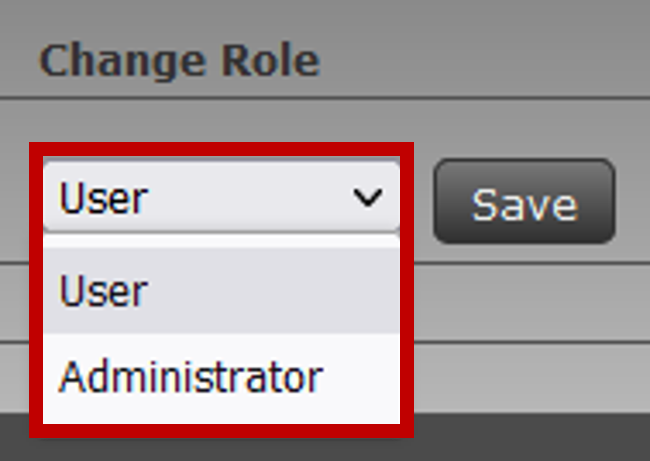
- The user will also appear in the “Active Users” list on the Manage Account Users page. DuraCloud will assign them the “User” role by default. To change their role, navigate to the Manage Account Users page, select their new role from the “Change Role” drop-down menu, and click “Save” to update their information.
There are two methods for adding existing users to your DuraCloud account:
- By email address:
- Proceed with the same steps to create a user.
- In the invitation email, the user will be instructed to connect directly to the organizational DuraCloud account using their existing user.
- By username:
- Request the username for the individual’s user account.
- Navigate to the Manage Account Users page in the Management Console.
- In the “Add Users” section, Enter their username under “Add an existing user by their username.”
- Once you click the “Add” button, an alert will be sent to the user’s associated email address to notify them of their access.
Managing User Groups
User groups are also created and managed through the Management Console. Groups can be assigned read/write permissions for spaces to help streamline space access controls.
Users must first be created and connected to your organization’s DuraCloud account before they can be added to user groups.
To create a new user group:
- Log into the DuraCloud Management Console.
- Navigate to the relevant account and click “Manage Groups” on the right.

- In the “Enter group name” field, type in a descriptive label for the user group and select “Add New Group.”

- If the field is left blank, a user group named “null” will be created instead. User groups cannot be renamed once created.
- The page will reload and the user group will be listed below. A list of users who can be added to the group will appear in the right pane.

- From the user list labelled “Available for Selection,” select the user/s that you would like to add to the group.
- Hold either the SHIFT or the CTRL (on Windows)/CMD (on Mac) key to select multiple users at once.
- Click “Add” to confirm your selection. The user/s will appear in the “Selected” list.
- If a user appears in this list in error, select their name and click “Remove.”
- Once the appropriate users are in the “Selected” list, click “Save.”
If you would like to change the users in a group, first return to the Manage Groups page:
- Locate and select the name of the group from the list.
- Click the “Edit” button, located above the list of group members on the right.
- Select users from the relevant lists and select “Add” or “Remove” as needed.
- Once you have made your changes, click “Save.”
To delete a group, locate the group from the list in the left pane, check the box to the left of its name, then click the “Remove Selected” button above to confirm your decision.
Spaces
Spaces are created and managed through the DuraCloud Interface. When you sign into the DuraCloud Interface, you will see a list of all spaces within the DuraCloud account in the left pane.
You will also see in the right “Spaces” pane a graph of total storage usage by files and size in your organization’s DuraCloud account over time.
Creating Spaces
Spaces are created from the main page of the DuraCloud Interface:
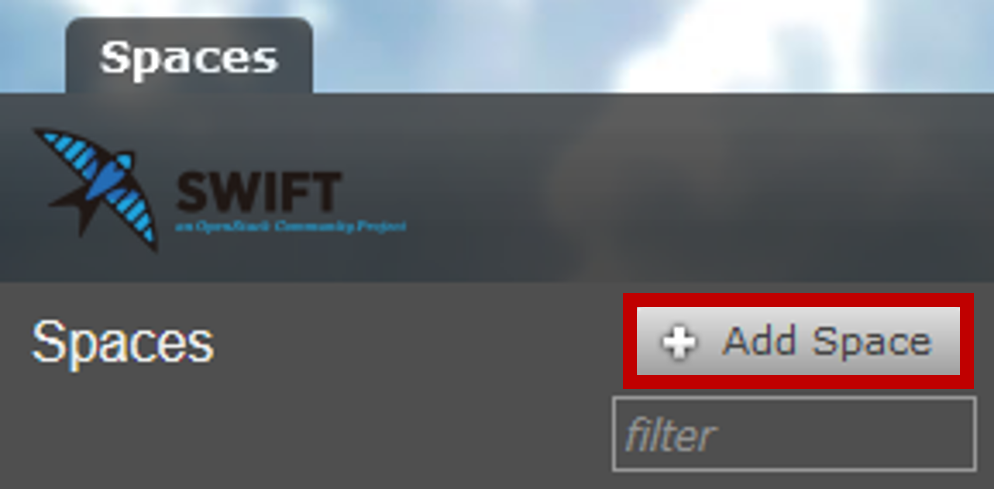
- Log into the DuraCloud interface.
- In the left pane, select the “Add Space” button above the search bar. You can access this button from the main page or an existing space.
- In the “Add Space” window, enter the name of your space in the “Space ID” field.
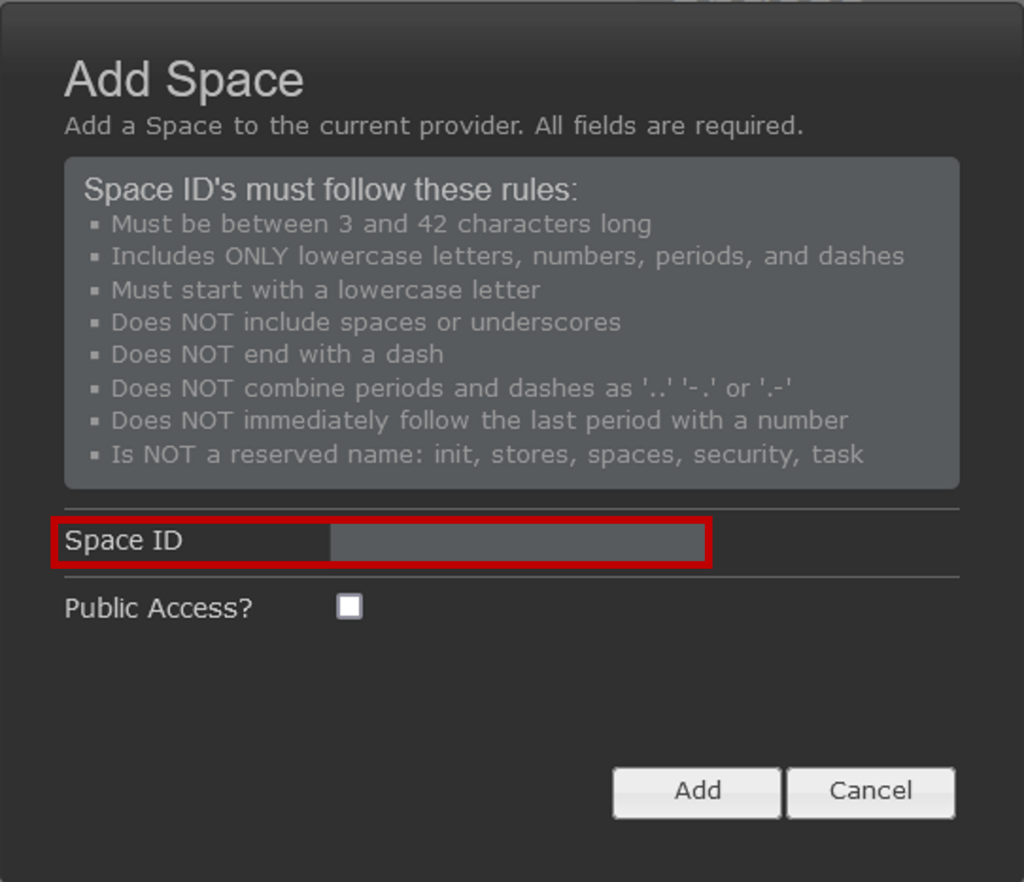
- If the space ID that you enter does not meet the naming restrictions, a red error notification will appear immediately below the field and you will not be able to create the space.
- An error message will not appear if there is a naming conflict with an existing space. While you will be able to click the “Add” button, a new space will not be created. A duplicate entry for the existing space may be added to the space listing, however this entry will disappear once the page is reloaded.
- Check the box next to “Public Access?” if you would like to share direct links to content in the space with all individuals connected to your campus IP range. Public access permissions can also be set or revoked at a later time.
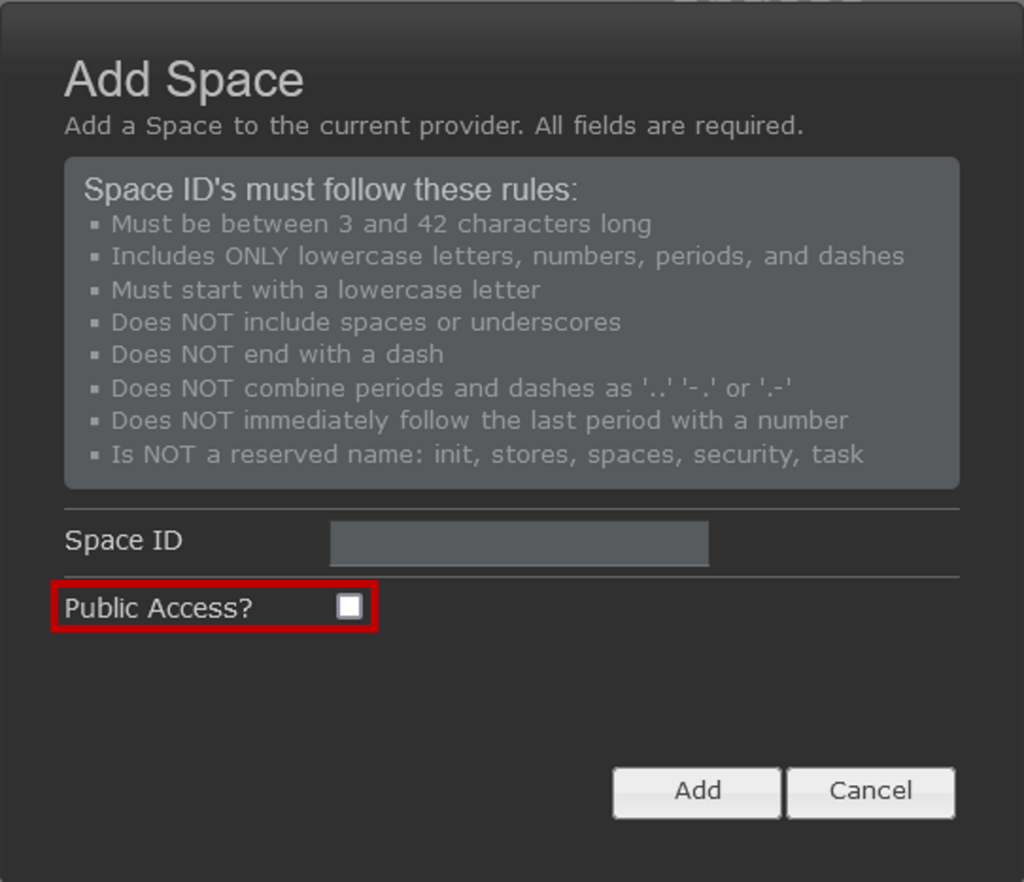
- Click “Add” to create the space.
Assigning Space Permissions
Once your space is created, you can set permissions for users and user groups to access the space.
- Select the space from the listing in the left pane to load the “Space Detail” pane on the right. The user who created the space will automatically be granted read and write permissions in the “Permissions” panel.

- To provide other users with access to a space, click the “Add” button in the top right corner of the “Permissions” panel. This will load a list of users and groups that you can set permissions for.
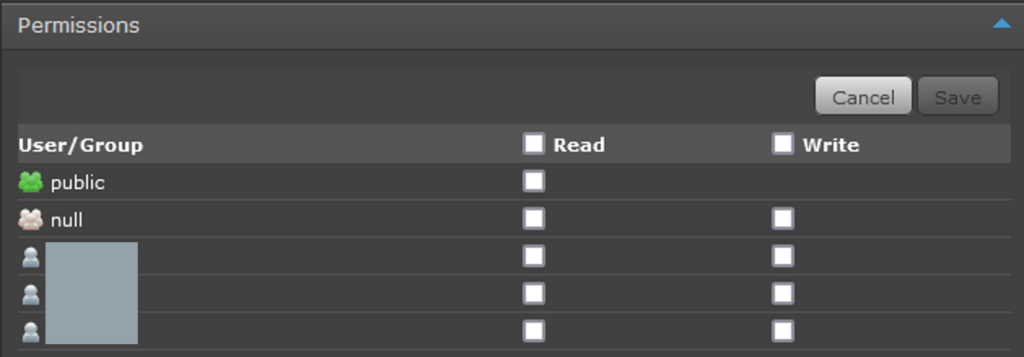
- Note that this list does not include users with the Owner or Administrator roles as users with these roles are automatically given access to all spaces.
- Check the boxes next to each user or group that should have read or write permissions for the space.
- Selecting the checkbox for write permissions will also automatically check the box for read permissions for that user or group.
- If you would like to grant access to all listed users and groups, check the box next to the “Read” and/or “Write” headings. As with the individual checkbox, selecting the checkbox next to “Write” will automatically select all boxes for read permissions as well.

- If “Read” permissions are enabled for the “public” user group, the space will be made publicly accessible once the permissions are saved. “Write” permissions are not available for the public user group.

- Click “Save” to confirm the permissions and update the table of users and their permissions.
If you would like to modify permissions for users and groups that have been granted access:
- Select the “Edit” button in the top right corner of the “Permissions” panel.
- Update user permissions as desired.
- Deselecting the checkbox for read permissions will automatically remove write permissions. Disabling both read and write permissions for a user or group will remove their access entirely.
- Once you’ve made your changes, select “Save” to implement the changes.
Providing Public Access
By default, spaces are accessible to authenticated DuraCloud users only. Content in a space can be made available to individuals within your campus IP ranges by enabling read-only permissions for the “public” user group. This user group is created by DuraCloud by default. If a space is made public, individuals on your campus network will be able to access content managed in DuraCloud using access links generated for each item.
Read-only access to a space can be enabled for the “public” group in two ways:
- At the top of the “Space Detail” pane, click the “Make publicly readable” button.
- In the “Permissions” panel, select the “Add” button, check the box to grant read permissions to the “public” user group , and click “Save.”
Reviewing Space History
The history of a space can be reviewed in two ways: through audit logs and health check reports.
Audit logs provide a record of all actions made in a space, and the time, user, and content associated with those actions as appropriate. When an action involves a content item, the MD5 checksum for that item is also noted.
Audit logs can be downloaded as TSV files by selecting the “Audit Log” button in the “Space Detail” pane. The file name will include the name of the space as well as the time and date that the log was downloaded.

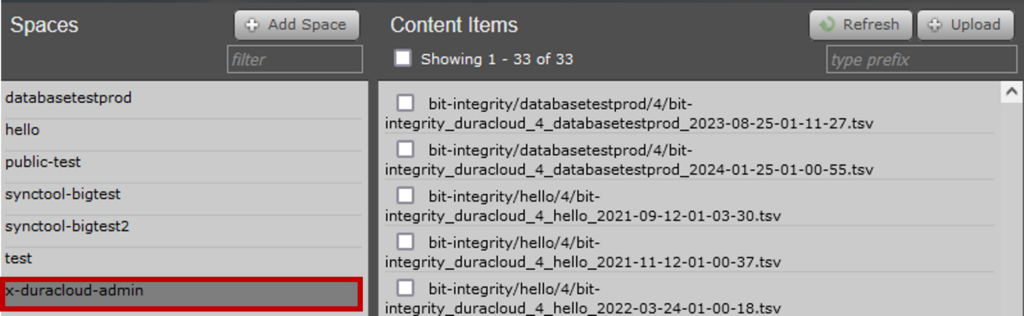
DuraCloud also runs routine health checks to confirm the fixity of data in each space and a TSV copy of each report is stored in the x-duracloud-admin space. This space is automatically created by DuraCloud when it performs the first health check for your account.
Report names begin with “bit-integrity/[space-name]” and end with the date and time that the report was generated. Reports are not deleted when the space that they correspond to is deleted.